JS App Walkthrough
Installation
You’ll need the following software to complete the tutorial, read on for specific installation instructions:
- Python
- A Python package manager such as pip (which normally comes with Python) or uv
- FastHTML
- Web browser
- Railway.app account
If you haven’t worked with Python before, we recommend getting started with Miniconda.
Note that you will only need to follow the steps in the installation section once per environment. If you create a new repo, you won’t need to redo these.
Install FastHTML
For Mac, Windows and Linux, enter:
pip install python-fasthtmlFirst steps
By the end of this section you’ll have your own FastHTML website with tests deployed to railway.app.
Create a hello world
Create a new folder to organize all the files for your project. Inside this folder, create a file called main.py and add the following code to it:
main.py
from fasthtml.common import *

app = FastHTML()
rt = app.route

@rt('/')
def get():
    return 'Hello, world!'

serve()
Finally, run python main.py in your terminal and open your browser to the ‘Link’ that appears.
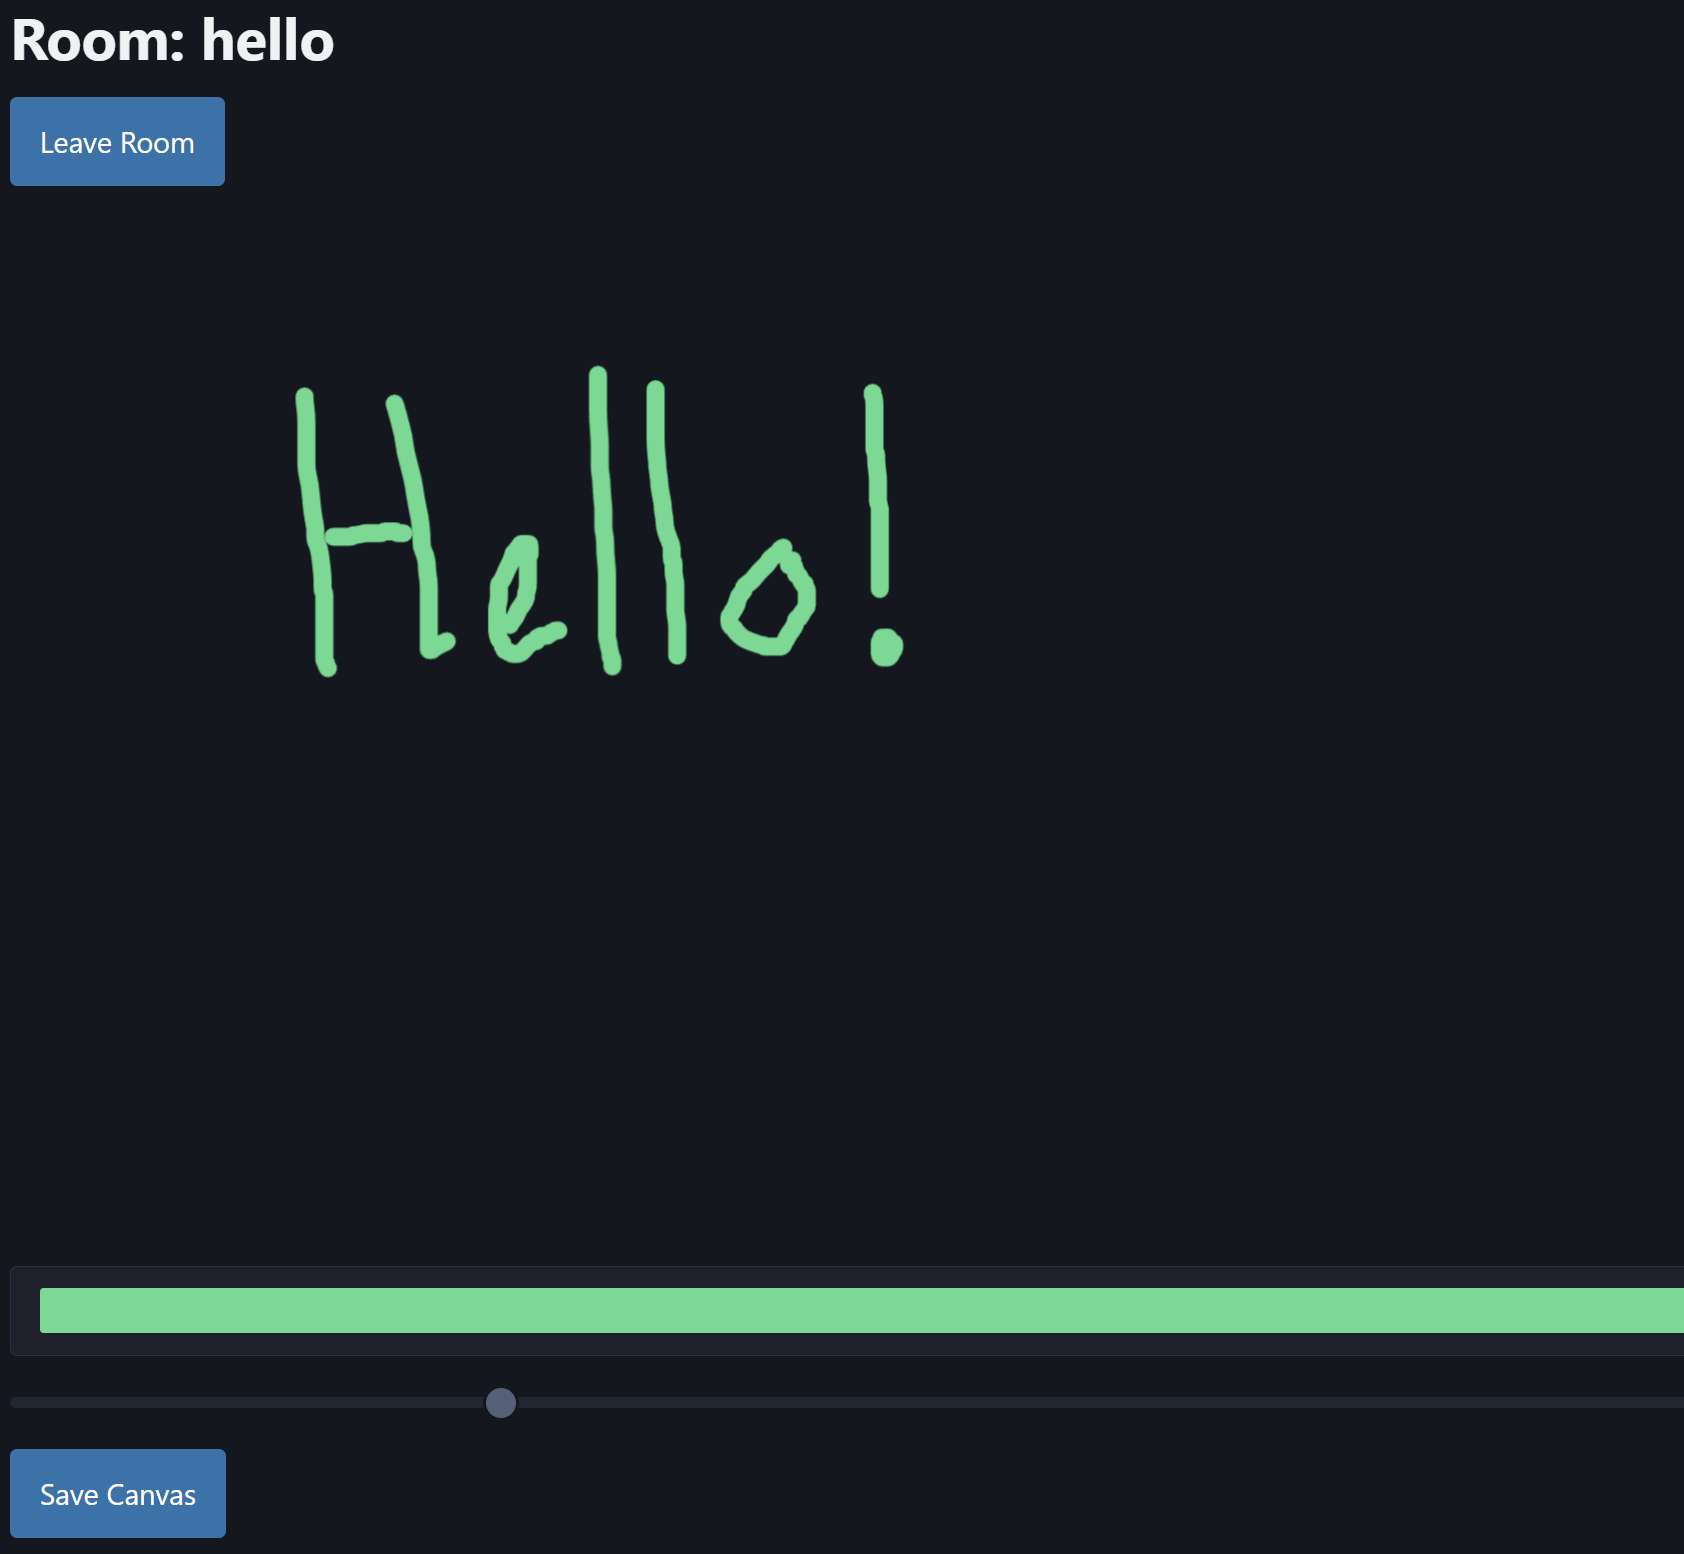
QuickDraw: A FastHTML Adventure 🎨✨
The end result of this tutorial will be QuickDraw, a real-time collaborative drawing app using FastHTML. Here is what the final site will look like:
Drawing Rooms
Drawing rooms are the core concept of our application. Each room represents a separate drawing space where a user can let their inner Picasso shine. Here’s a detailed breakdown:
- Room Creation and Storage
main.py
db = database('data/drawapp.db')
rooms = db.t.rooms
if rooms not in db.t:
    rooms.create(id=int, name=str, created_at=str, pk='id')
Room = rooms.dataclass()

@patch
def __ft__(self:Room):
    return Li(A(self.name, href=f"/rooms/{self.id}"))
Or you can use our fast_app function to create a FastHTML app with a SQLite database and dataclass in one line:
main.py
def render(room):
    return Li(A(room.name, href=f"/rooms/{room.id}"))

app,rt,rooms,Room = fast_app('data/drawapp.db', render=render, id=int, name=str, created_at=str, pk='id')
We are specifying a render function to convert our dataclass into HTML, which is the same as extending the __ft__ method from the patch decorator we used before. We will use this method for the rest of the tutorial since it is a lot cleaner and easier to read.
- We’re using a SQLite database (via FastLite) to store our rooms.
- Each room has an id (integer), a name (string), and a created_at timestamp (string).
- The Room dataclass is automatically generated based on this structure.
- Creating a room
main.py
@rt("/")
def get():
    # The 'Input' id defaults to the same as the name, so you can omit it if you wish
    create_room = Form(Input(id="name", name="name", placeholder="New Room Name"),
                       Button("Create Room"),
                       hx_post="/rooms", hx_target="#rooms-list", hx_swap="afterbegin")
    rooms_list = Ul(*rooms(order_by='id DESC'), id='rooms-list')
    return Titled("DrawCollab",
                  H1("DrawCollab"),
                  create_room, rooms_list)

@rt("/rooms")
async def post(room:Room):
    room.created_at = datetime.now().isoformat()
return rooms.insert(room)- When a user submits the “Create Room” form, this route is called.
- It creates a new Room object, sets the creation time, and inserts it into the database.
- It returns an HTML list item with a link to the new room, which is dynamically added to the room list on the homepage thanks to HTMX.
- Let’s give our rooms shape
main.py
@rt("/rooms/{id}")
async def get(id:int):
    room = rooms[id]
return Titled(f"Room: {room.name}", H1(f"Welcome to {room.name}"), A(Button("Leave Room"), href="/"))- This route renders the interface for a specific room.
- It fetches the room from the database and renders a title, heading, and paragraph.
Here is the full code so far:
main.py
from fasthtml.common import *
from datetime import datetime

def render(room):
    return Li(A(room.name, href=f"/rooms/{room.id}"))

app,rt,rooms,Room = fast_app('data/drawapp.db', render=render, id=int, name=str, created_at=str, pk='id')

@rt("/")
def get():
    create_room = Form(Input(id="name", name="name", placeholder="New Room Name"),
                       Button("Create Room"),
                       hx_post="/rooms", hx_target="#rooms-list", hx_swap="afterbegin")
    rooms_list = Ul(*rooms(order_by='id DESC'), id='rooms-list')
    return Titled("DrawCollab", create_room, rooms_list)

@rt("/rooms")
async def post(room:Room):
    room.created_at = datetime.now().isoformat()
    return rooms.insert(room)

@rt("/rooms/{id}")
async def get(id:int):
    room = rooms[id]
    return Titled(f"Room: {room.name}", H1(f"Welcome to {room.name}"), A(Button("Leave Room"), href="/"))

serve()
Now run python main.py in your terminal and open your browser to the ‘Link’ that appears. You should see a page with a form to create a new room and a list of existing rooms.
The Canvas - Let’s Get Drawing! 🖌️
Time to add the actual drawing functionality. We’ll use Fabric.js for this:
main.py
# ... (keep the previous imports and database setup)

@rt("/rooms/{id}")
async def get(id:int):
    room = rooms[id]
    canvas = Canvas(id="canvas", width="800", height="600")
    color_picker = Input(type="color", id="color-picker", value="#3CDD8C")
    brush_size = Input(type="range", id="brush-size", min="1", max="50", value="10")

    js = """
    var canvas = new fabric.Canvas('canvas');
    canvas.isDrawingMode = true;
    canvas.freeDrawingBrush.color = '#3CDD8C';
    canvas.freeDrawingBrush.width = 10;

    document.getElementById('color-picker').onchange = function() {
        canvas.freeDrawingBrush.color = this.value;
    };

    document.getElementById('brush-size').oninput = function() {
        canvas.freeDrawingBrush.width = parseInt(this.value, 10);
    };
    """

    return Titled(f"Room: {room.name}",
                  A(Button("Leave Room"), href="/"),
                  canvas,
                  Div(color_picker, brush_size),
                  Script(src="https://cdnjs.cloudflare.com/ajax/libs/fabric.js/5.3.1/fabric.min.js"),
                  Script(js))

# ... (keep the serve() part)
Now we’ve got a drawing canvas! FastHTML makes it easy to include external libraries and add custom JavaScript.
Saving and Loading Canvases 💾
Now that we have a working drawing canvas, let’s add the ability to save and load drawings. We’ll modify our database schema to include a canvas_data field, and add new routes for saving and loading canvas data. Here’s how we’ll update our code:
- Modify the database schema:
main.py
app,rt,rooms,Room = fast_app('data/drawapp.db', render=render, id=int, name=str, created_at=str, canvas_data=str, pk='id')- Add a save button that grabs the canvas’ state and sends it to the server:
main.py
@rt("/rooms/{id}")
async def get(id:int):
    room = rooms[id]
    canvas = Canvas(id="canvas", width="800", height="600")
    color_picker = Input(type="color", id="color-picker", value="#3CDD8C")
    brush_size = Input(type="range", id="brush-size", min="1", max="50", value="10")
    save_button = Button("Save Canvas", id="save-canvas", hx_post=f"/rooms/{id}/save", hx_vals="js:{canvas_data: JSON.stringify(canvas.toJSON())}")
# ... (rest of the function remains the same)- Add routes for saving and loading canvas data:
main.py
@rt("/rooms/{id}/save")
async def post(id:int, canvas_data:str):
    rooms.update({'canvas_data': canvas_data}, id)
    return "Canvas saved successfully"

@rt("/rooms/{id}/load")
async def get(id:int):
    room = rooms[id]
return room.canvas_data if room.canvas_data else "{}"- Update the JavaScript to load existing canvas data:
main.py
js = f"""
    var canvas = new fabric.Canvas('canvas');
    canvas.isDrawingMode = true;
    canvas.freeDrawingBrush.color = '#3CDD8C';
    canvas.freeDrawingBrush.width = 10;
    // Load existing canvas data
    fetch(`/rooms/{id}/load`)
    .then(response => response.json())
    .then(data => {{
        if (data && Object.keys(data).length > 0) {{
            canvas.loadFromJSON(data, canvas.renderAll.bind(canvas));
        }}
    }});

    // ... (rest of the JavaScript remains the same)
"""
With these changes, users can now save their drawings and load them when they return to the room. The canvas data is stored as a JSON string in the database, allowing for easy serialization and deserialization. Try it out! Create a new room, make a drawing, save it, and then reload the page. You should see your drawing reappear, ready for further editing.
Here is the completed code:
main.py
from fasthtml.common import *
from datetime import datetime

def render(room):
    return Li(A(room.name, href=f"/rooms/{room.id}"))

app,rt,rooms,Room = fast_app('data/drawapp.db', render=render, id=int, name=str, created_at=str, canvas_data=str, pk='id')

@rt("/")
def get():
    create_room = Form(Input(id="name", name="name", placeholder="New Room Name"),
                       Button("Create Room"),
                       hx_post="/rooms", hx_target="#rooms-list", hx_swap="afterbegin")
    rooms_list = Ul(*rooms(order_by='id DESC'), id='rooms-list')
    return Titled("QuickDraw",
                  create_room, rooms_list)

@rt("/rooms")
async def post(room:Room):
    room.created_at = datetime.now().isoformat()
    return rooms.insert(room)

@rt("/rooms/{id}")
async def get(id:int):
    room = rooms[id]
    canvas = Canvas(id="canvas", width="800", height="600")
    color_picker = Input(type="color", id="color-picker", value="#000000")
    brush_size = Input(type="range", id="brush-size", min="1", max="50", value="10")
    save_button = Button("Save Canvas", id="save-canvas", hx_post=f"/rooms/{id}/save", hx_vals="js:{canvas_data: JSON.stringify(canvas.toJSON())}")

    js = f"""
    var canvas = new fabric.Canvas('canvas');
    canvas.isDrawingMode = true;
    canvas.freeDrawingBrush.color = '#000000';
    canvas.freeDrawingBrush.width = 10;

    // Load existing canvas data
    fetch(`/rooms/{id}/load`)
    .then(response => response.json())
    .then(data => {{
        if (data && Object.keys(data).length > 0) {{
            canvas.loadFromJSON(data, canvas.renderAll.bind(canvas));
        }}
    }});

    document.getElementById('color-picker').onchange = function() {{
        canvas.freeDrawingBrush.color = this.value;
    }};

    document.getElementById('brush-size').oninput = function() {{
        canvas.freeDrawingBrush.width = parseInt(this.value, 10);
    }};
    """

    return Titled(f"Room: {room.name}",
                  A(Button("Leave Room"), href="/"),
                  canvas,
                  Div(color_picker, brush_size, save_button),
                  Script(src="https://cdnjs.cloudflare.com/ajax/libs/fabric.js/5.3.1/fabric.min.js"),
                  Script(js))

@rt("/rooms/{id}/save")
async def post(id:int, canvas_data:str):
    rooms.update({'canvas_data': canvas_data}, id)
    return "Canvas saved successfully"

@rt("/rooms/{id}/load")
async def get(id:int):
    room = rooms[id]
    return room.canvas_data if room.canvas_data else "{}"

serve()
Deploying to Railway
You can deploy your website to a number of hosting providers, for this tutorial we’ll be using Railway. To get started, make sure you create an account and install the Railway CLI. Once installed, make sure to run railway login to log in to your account.
To make deploying your website as easy as possible, FastHTMl comes with a built in CLI tool that will handle most of the deployment process for you. To deploy your website, run the following command in your terminal in the root directory of your project:
fh_railway_deploy quickdrawYour app must be located in a main.py file for this to work.
Conclusion: You’re a FastHTML Artist Now! 🎨🚀
Congratulations! You’ve just built a sleek, interactive web application using FastHTML. Let’s recap what we’ve learned:
- FastHTML allows you to create dynamic web apps with minimal code.
- We used FastHTML’s routing system to handle different pages and actions.
- We integrated with a SQLite database to store room information and canvas data.
- We utilized Fabric.js to create an interactive drawing canvas.
- We implemented features like color picking, brush size adjustment, and canvas saving.
- We used HTMX for seamless, partial page updates without full reloads.
- We learned how to deploy our FastHTML application to Railway for easy hosting.
You’ve taken your first steps into the world of FastHTML development. From here, the possibilities are endless! You could enhance the drawing app further by adding features like:
- Implementing different drawing tools (e.g., shapes, text)
- Adding user authentication
- Creating a gallery of saved drawings
- Implementing real-time collaborative drawing using WebSockets
Whatever you choose to build next, FastHTML has got your back. Now go forth and create something awesome! Happy coding! 🖼️🚀